
10 Budget Kitchen Makeovers You’ll Love
Ready to transform your kitchen without breaking the bank? Peel-and-stick veneer offers a budget-friendly cabinet makeover you can complete in a weekend! Forget costly demolition and replacement – this DIY project delivers stunning results with minimal effort. I’ll guide you through the entire process, from cleaning and precise measuring to cutting and applying the veneer for a flawless, bubble-free finish. Discover expert tips on choosing the perfect style to match your décor and mastering those challenging curved surfaces. Get ready to achieve a brand-new kitchen look while saving serious cash. Let’s dive in and revitalize your cabinets!
Living Around the World is part of the Amazon associate network. As an Amazon associate we may earn a small commission when a user makes a qualifying purchase.
Update Kitchen Cabinets with Peel & Stick
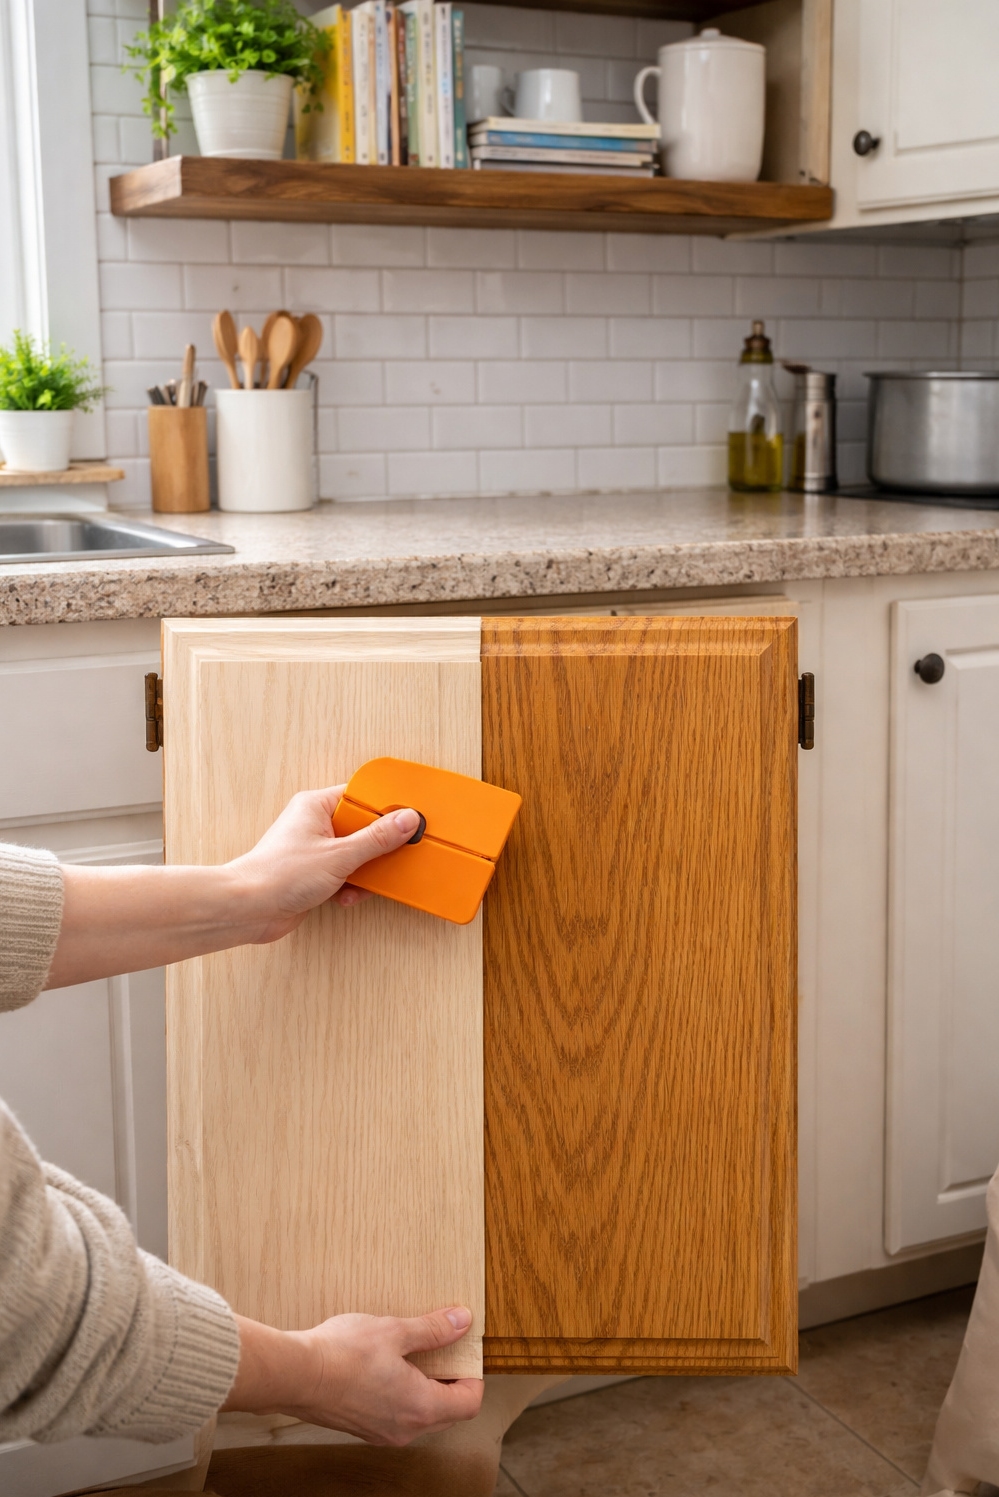
This method involves updating your kitchen cabinets by applying a peel-and-stick veneer to the existing surfaces, providing a fresh look without the cost of replacing the entire cabinet. This is a quick and relatively inexpensive way to dramatically change the appearance of your kitchen.
Steps
- Thoroughly clean and degrease the cabinet surfaces.
- Measure and cut the peel-and-stick veneer to the appropriate size for each cabinet door and drawer front.
- Carefully apply the veneer, smoothing out any air bubbles as you go.
- Trim any excess veneer with a utility knife for a clean edge.
- Replace or update cabinet hardware for a final touch.
Tips
- Choose a veneer that complements your existing kitchen style and color scheme.
- Use a heat gun or hairdryer to help the veneer adhere better to curved surfaces.
Wrap
Take your time and ensure precise measurements for a professional-looking finish. Always follow the manufacturer’s instructions for the veneer.
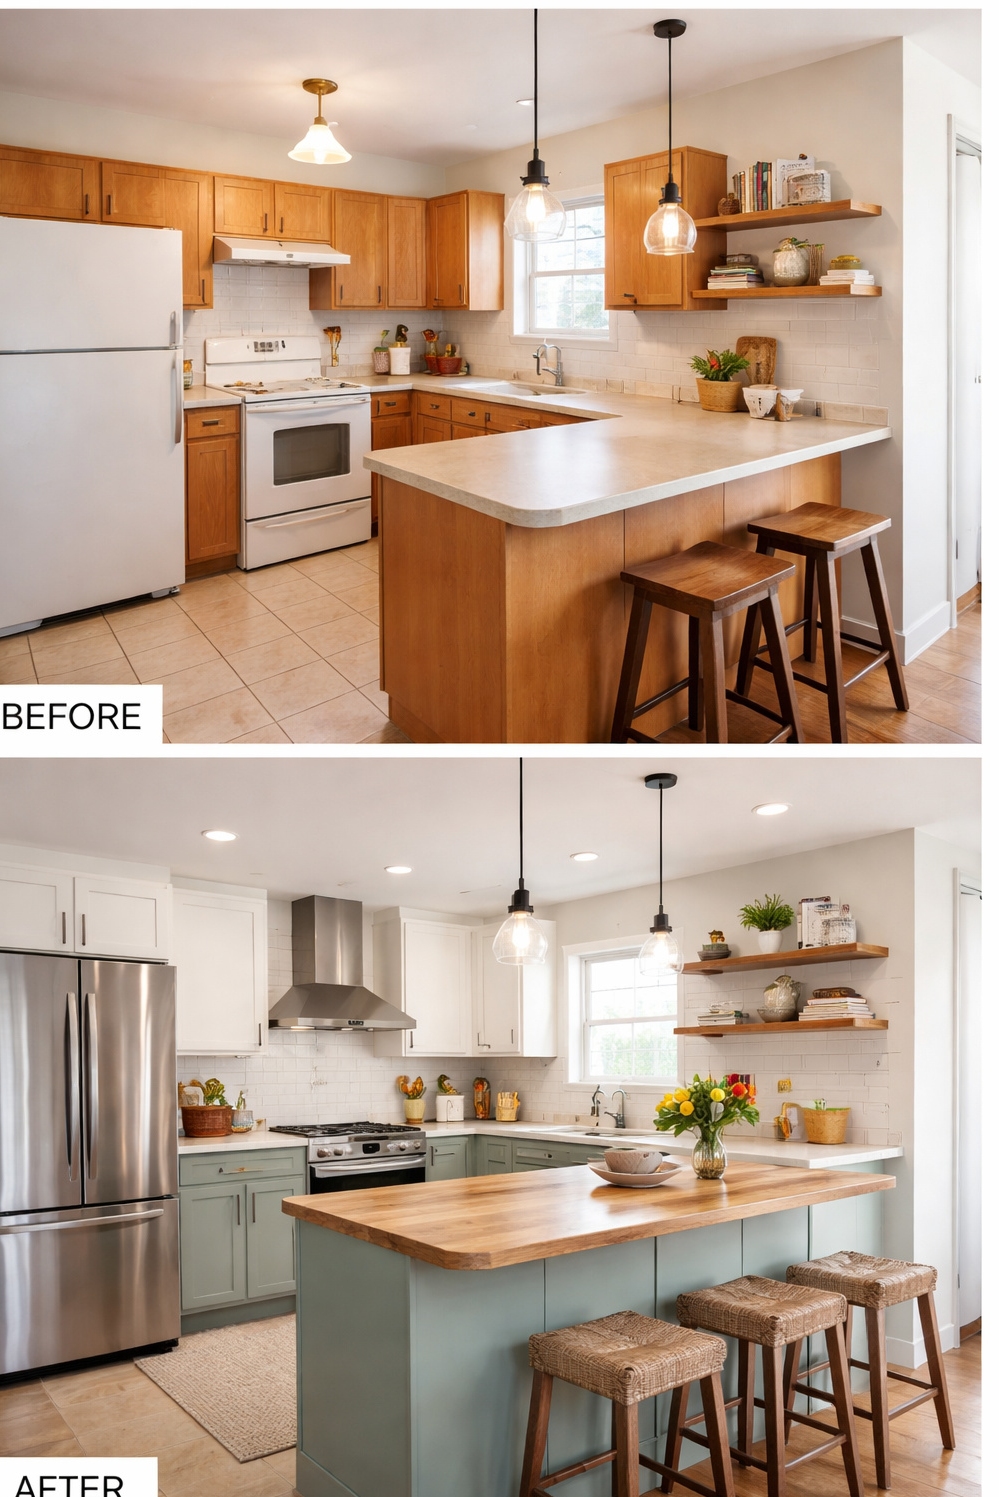
Replace Upper Cabinets with Open Shelving
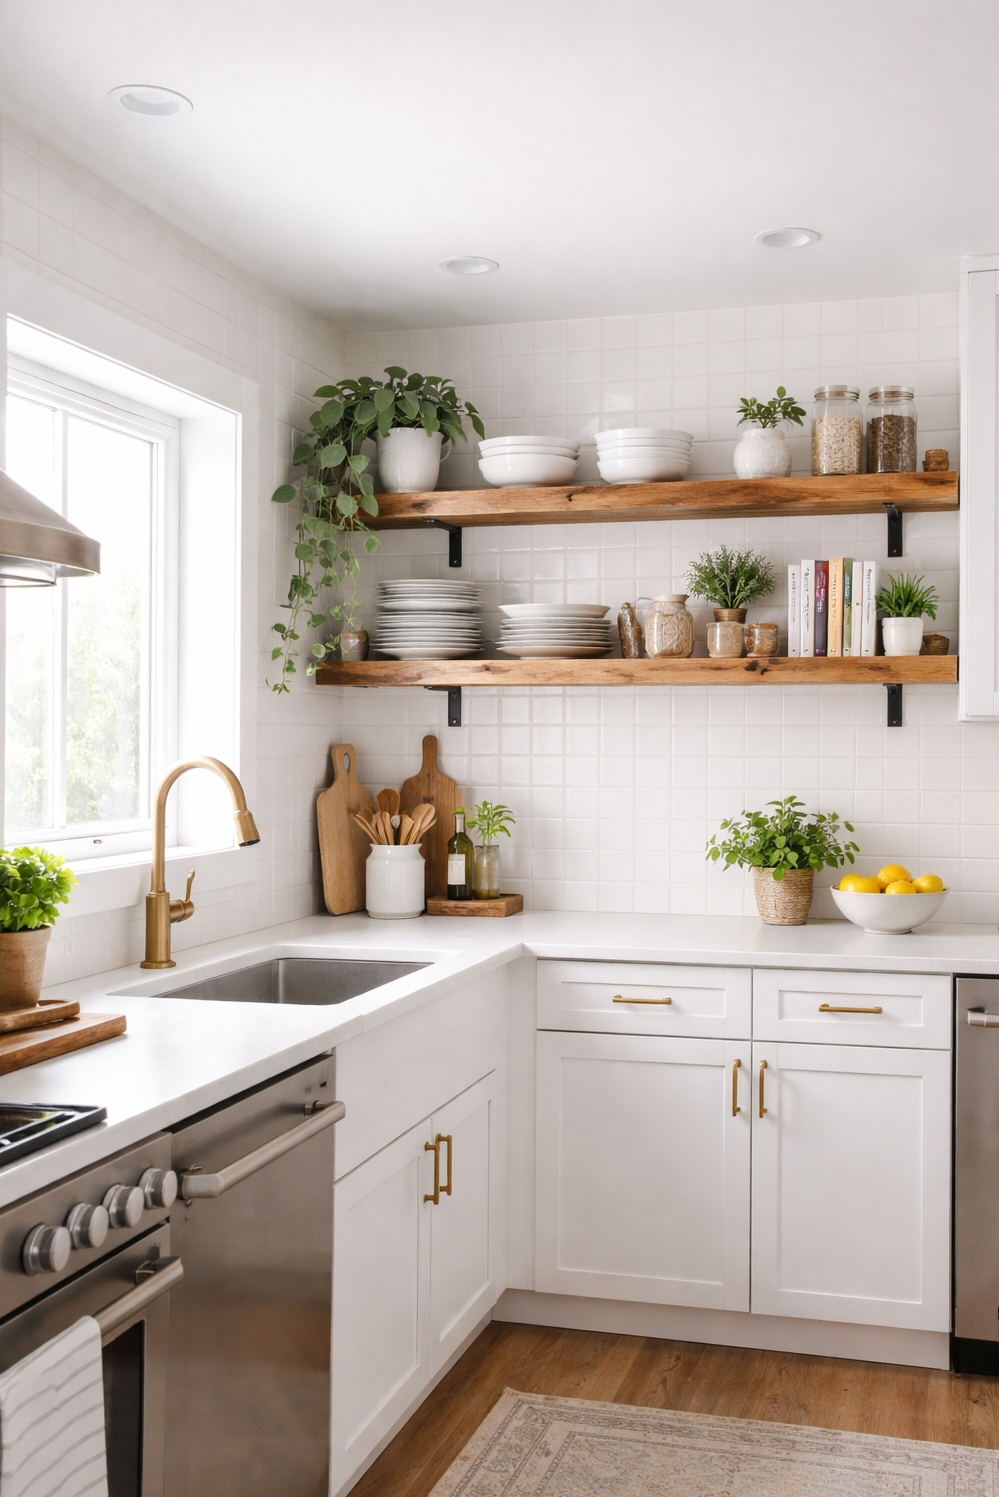
Replace upper cabinets with open shelving made from reclaimed wood to create a more airy and modern feel while saving money. This method adds character and provides accessible storage.
Steps
- Source reclaimed wood planks of desired length and width.
- Clean, sand, and seal the wood to protect it from moisture and wear.
- Install sturdy shelf brackets securely to the wall studs.
- Mount the wood planks onto the brackets, ensuring they are level.
- Style the shelves with your favorite dishes, plants, and decorative items.
Tips
- Use a stud finder to locate wall studs for secure bracket installation.
- Consider the weight capacity of the brackets and wood when choosing items to display.
Wrap
Open shelving can transform your kitchen, but ensure proper installation for safety. Regularly clean the shelves to maintain their appearance.
Quick Kitchen Update: Faucet and Hardware
Updating your kitchen’s faucet and cabinet hardware is a quick and impactful way to modernize the space without major demolition. This method focuses on replacing existing fixtures with more stylish and affordable alternatives.
Steps
- Measure existing faucet and hardware to ensure compatibility with replacements.
- Turn off water supply to the faucet and disconnect the old faucet.
- Install the new faucet according to the manufacturer’s instructions.
- Remove old cabinet hardware (knobs, pulls) and install the new hardware.
- Test the new faucet for leaks and ensure all hardware is securely attached.
Tips
- Consider purchasing hardware in bulk online for potential cost savings.
- Use painter’s tape to mark screw hole locations for accurate hardware installation.
Wrap
A simple faucet and hardware update can significantly improve the look and feel of your kitchen. Always follow manufacturer’s instructions and safety precautions.
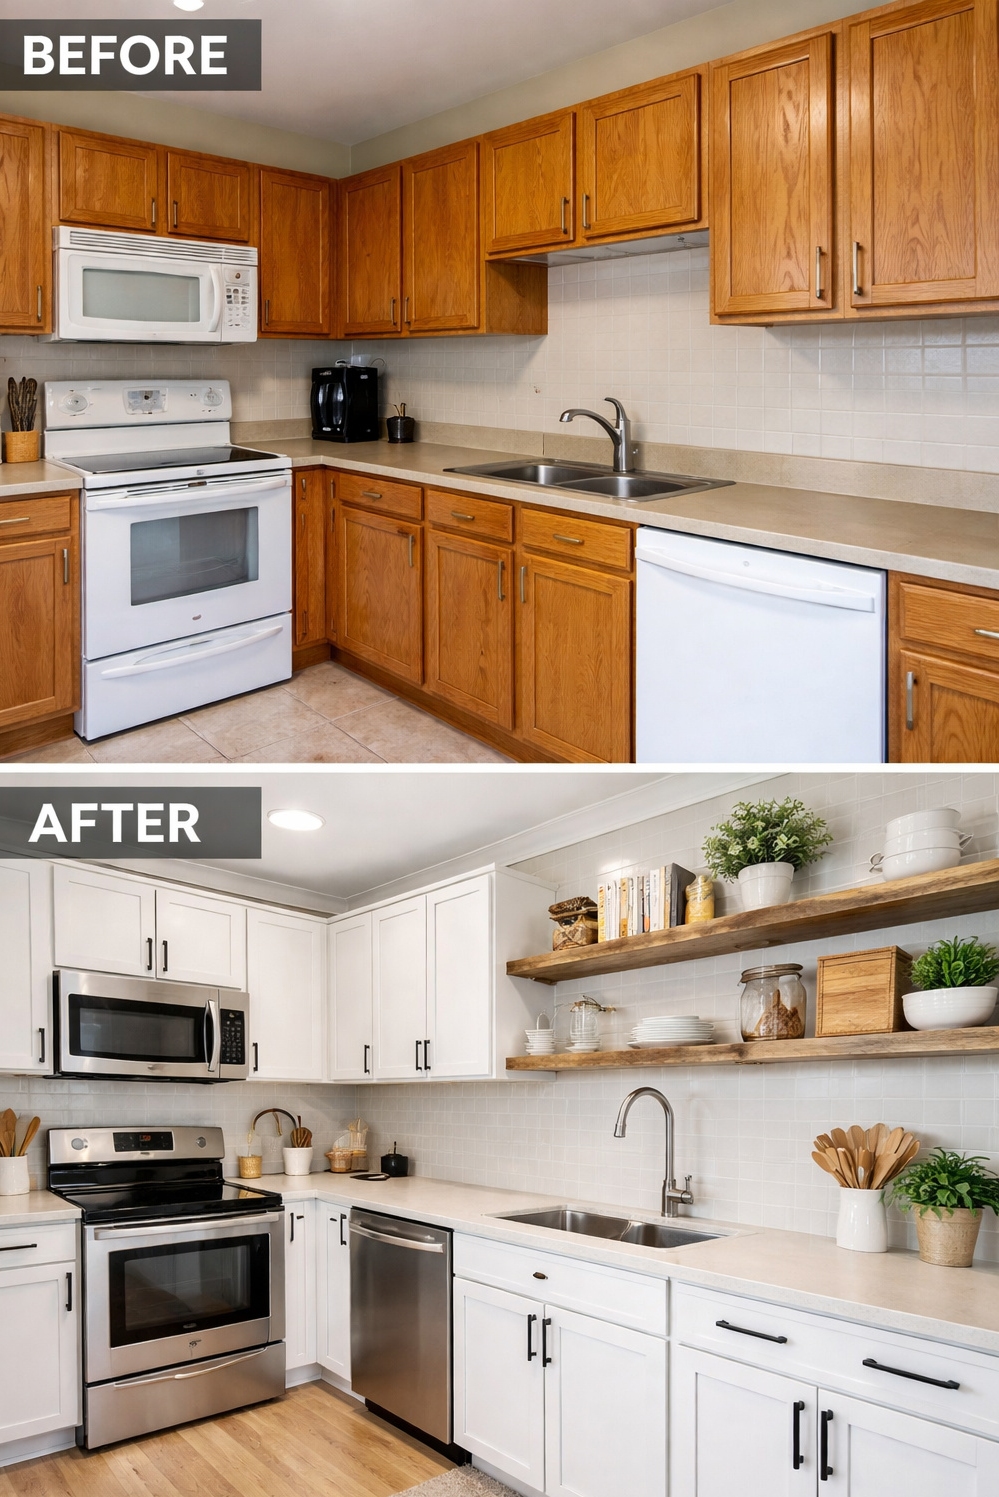
Paint Existing Kitchen Cabinets Cost-Effectively

Painting your existing kitchen cabinets is a cost-effective way to dramatically change the look of your kitchen. This method focuses on proper preparation and painting techniques for a professional finish.
Steps
- Remove cabinet doors and drawers, labeling each for easy reinstallation.
- Clean all surfaces thoroughly with a degreaser and lightly sand to create a smooth surface.
- Apply a primer specifically designed for cabinets to ensure proper adhesion.
- Apply two coats of high-quality cabinet paint, allowing each coat to dry completely.
- Reinstall cabinet doors and drawers, adjusting hinges as needed.
Tips
- Use a paint sprayer for a smoother, more even finish.
- Consider using a durable topcoat for added protection against scratches and stains.
Wrap
A fresh coat of paint can transform your cabinets and revitalize your kitchen. Always work in a well-ventilated area and follow paint manufacturer’s instructions.
Install a Peel-and-Stick Backsplash Now
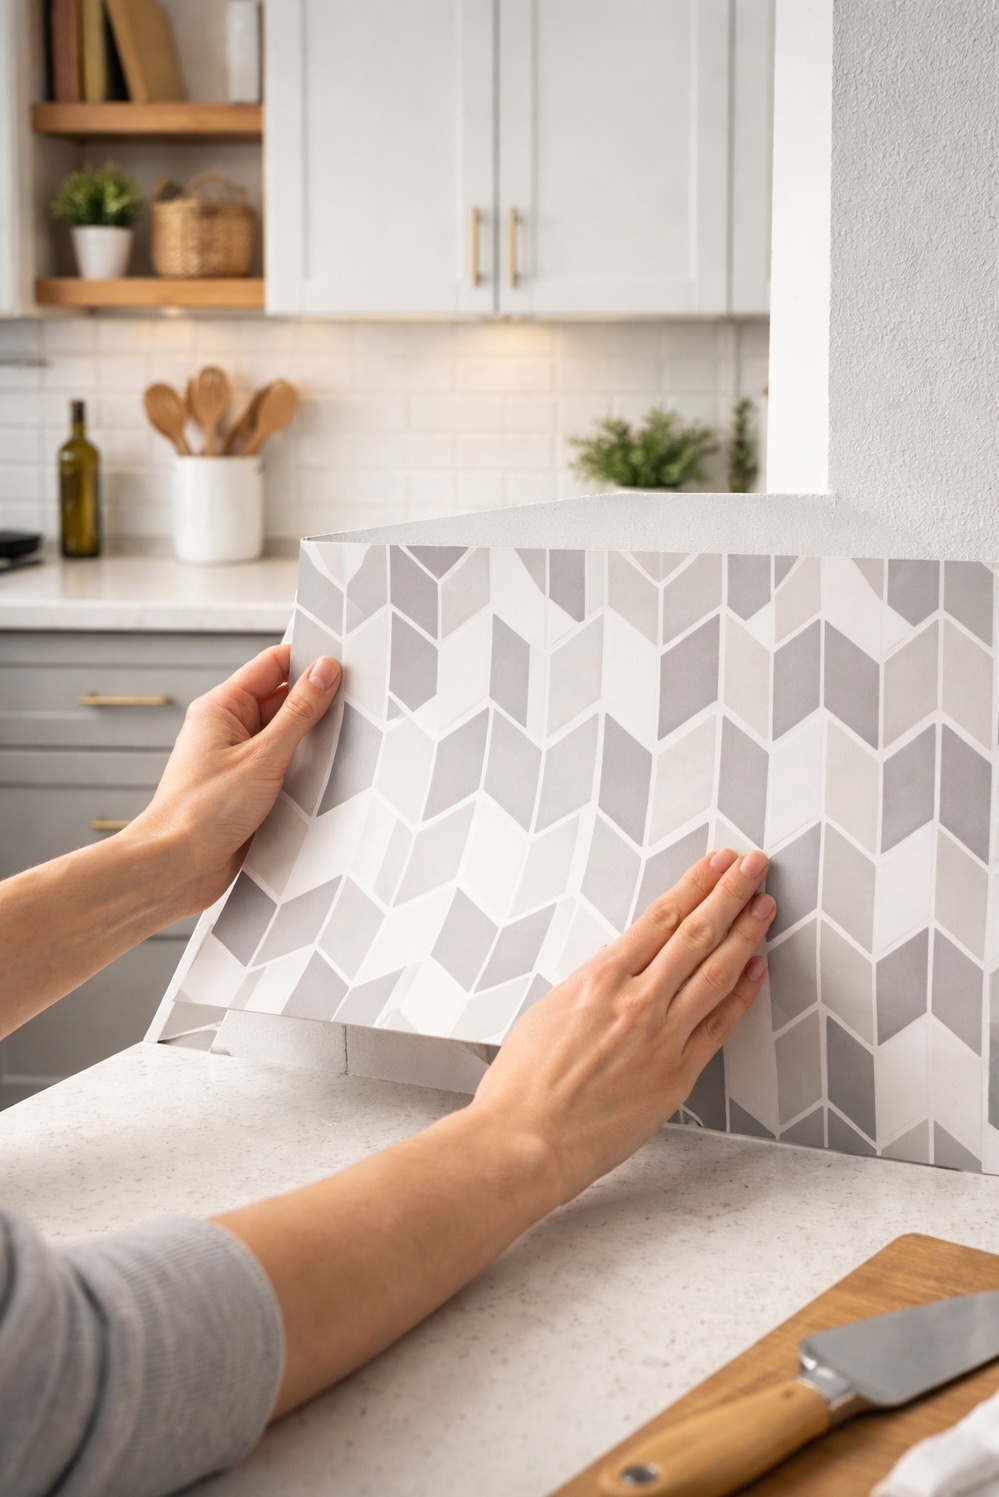
This method involves installing a new backsplash using peel-and-stick tiles, instantly updating the kitchen’s look without the mess and cost of traditional tiling. It’s a quick and relatively inexpensive way to add personality and visual interest.
Wrap
- Clean and prepare the existing backsplash area by removing any grease or debris.
- Measure and cut the peel-and-stick tiles to fit the desired area, accounting for outlets and other fixtures.
- Peel off the backing and carefully apply the tiles, ensuring they are straight and aligned.
- Use a utility knife to trim any excess tile around edges and outlets.
- Seal the edges with caulk for a clean and waterproof finish.
- With careful planning and execution, a peel-and-stick backsplash can dramatically improve your kitchen’s aesthetic. Always follow the manufacturer’s instructions for the best results.
Tips
- Start with a small, inconspicuous area to practice your technique.
- Overlap tiles slightly for a more seamless look.
Replace Inadequate Kitchen Lights: Quick Method
This method focuses on replacing outdated or inadequate kitchen lighting with stylish and affordable plug-in fixtures. This avoids the need for electrical work, making it a simple and budget-friendly upgrade.
Wrap
- Identify areas where additional lighting is needed, such as over the sink or island.
- Choose plug-in pendant lights, sconces, or under-cabinet lights that complement your kitchen’s style.
- Install hooks or mounting hardware as needed to hang or secure the fixtures.
- Plug in the new lights and conceal the cords as much as possible using cord covers or clips.
- Adjust the placement and brightness of the lights to achieve the desired effect.
- Upgrading your kitchen lighting with plug-in fixtures is a simple and effective way to improve both its functionality and aesthetic appeal. Always follow safety guidelines when working with electricity.
Tips
- Consider using LED bulbs for energy efficiency and longer lifespan.
- Use dimmers to control the brightness and create ambiance.
Apply a Thin Concrete Countertop Layer
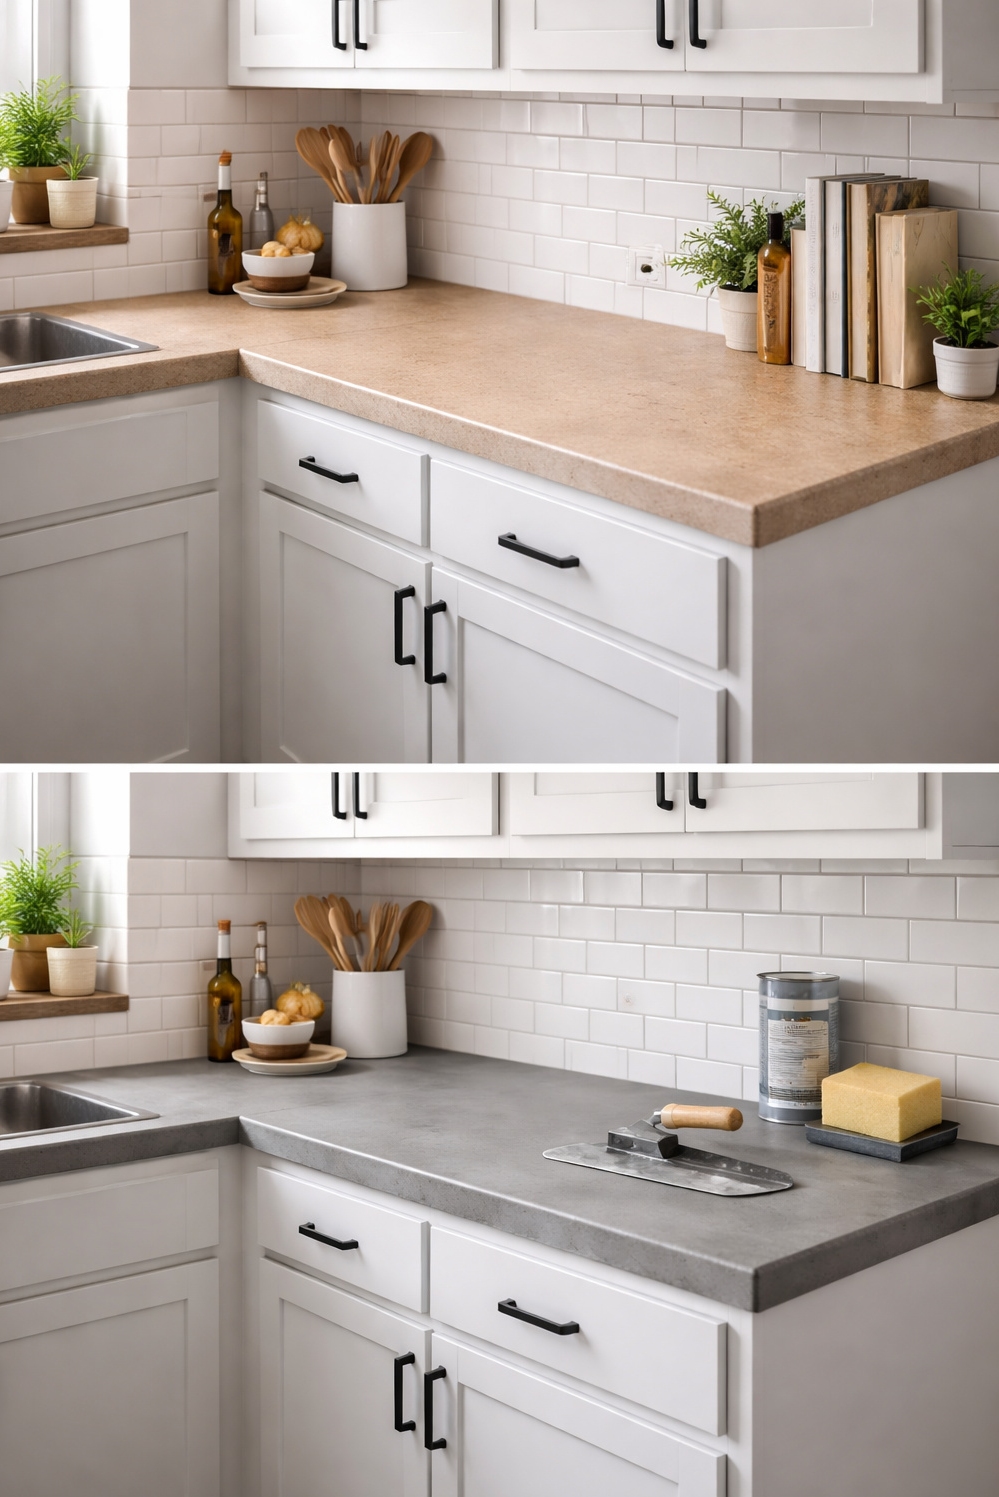
This method involves applying a thin layer of concrete over your existing countertops to create a modern, industrial look without the cost of full replacement. It’s a budget-friendly way to dramatically change the aesthetic of your kitchen.
Steps
- Thoroughly clean and sand your existing countertops to create a rough surface for adhesion.
- Apply a bonding agent according to the manufacturer’s instructions.
- Mix the concrete overlay according to the instructions and apply a thin, even layer using a trowel.
- Allow the concrete to cure completely, then sand smooth and seal with a food-safe sealant.
- Apply multiple coats of sealant, allowing each to dry completely before applying the next.
Tips
- Practice on a scrap piece of material first to get the hang of the application process.
- Use stencils or stamps to create patterns in the concrete before it dries.
Wrap
Always follow safety precautions when working with concrete and sealants. Ensure proper ventilation during application and curing.
Create a Stylish Kitchen Island by Repurposing
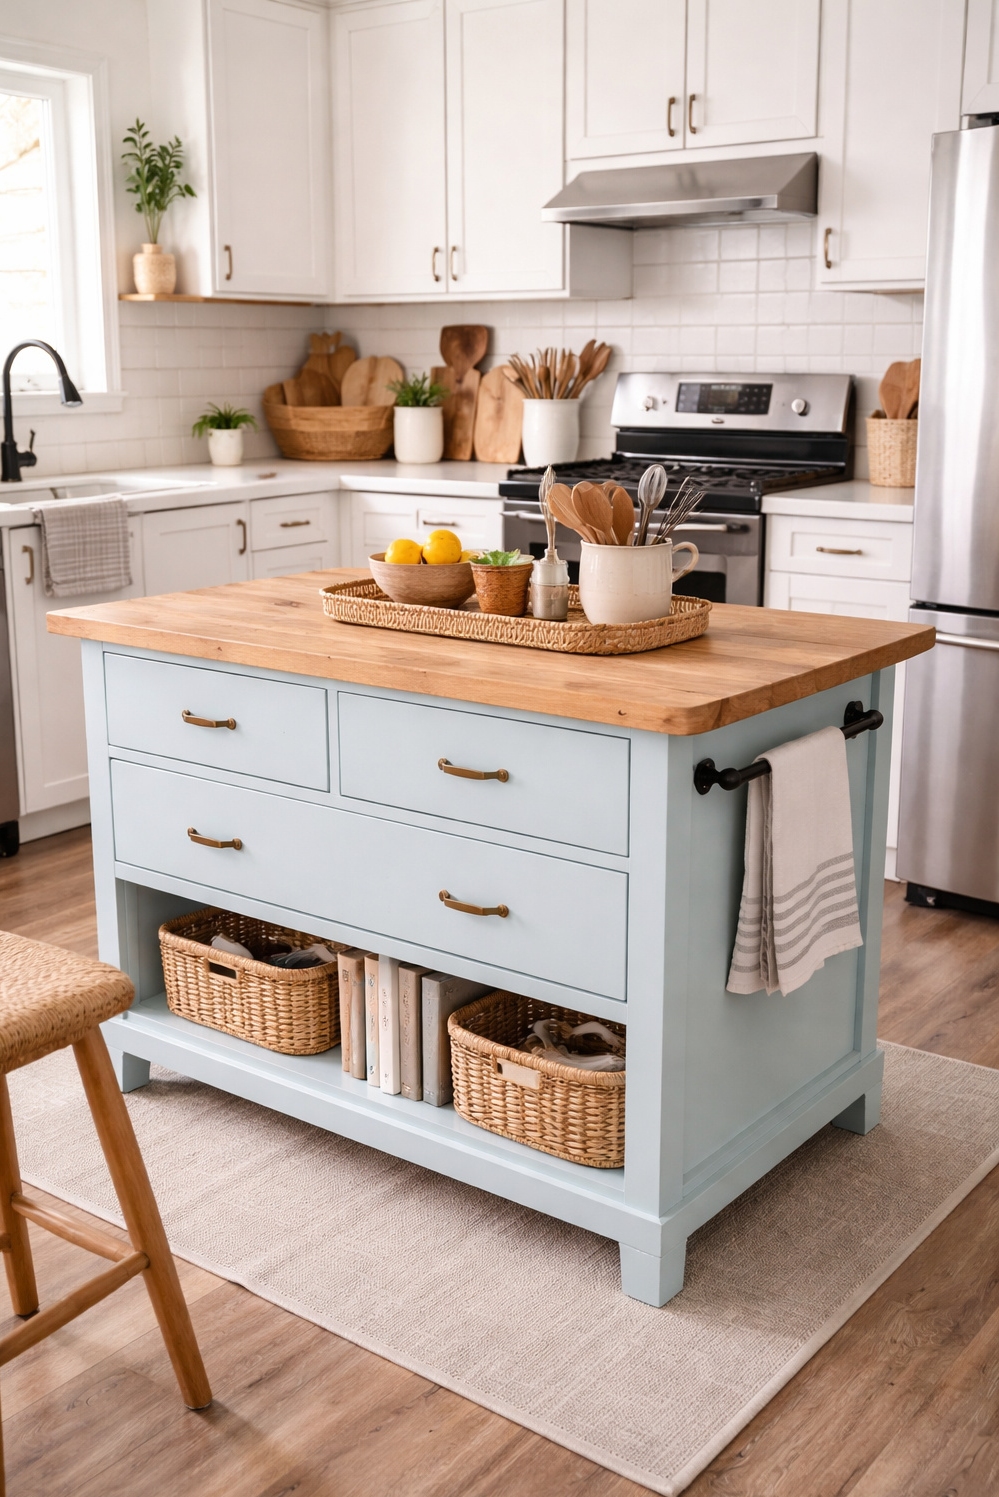
Create a functional and stylish kitchen island by repurposing an existing piece of furniture, such as a dresser or console table. This is a cost-effective way to add storage and workspace to your kitchen.
Steps
- Select a sturdy piece of furniture that is the appropriate size and height for a kitchen island.
- Clean and sand the furniture thoroughly.
- Paint or stain the furniture to match your kitchen’s decor.
- Add a countertop made from butcher block, reclaimed wood, or even a durable laminate sheet.
- Consider adding casters for mobility and towel bars or hooks for added functionality.
Tips
- Secure the countertop to the furniture base with screws and construction adhesive.
- Add shelving or drawers to the island for extra storage.
Wrap
Ensure the repurposed furniture is stable and secure before using it as a kitchen island. Consider the weight capacity of the furniture when choosing a countertop material.
Maximize Kitchen Impact: Appliance Upgrade Method
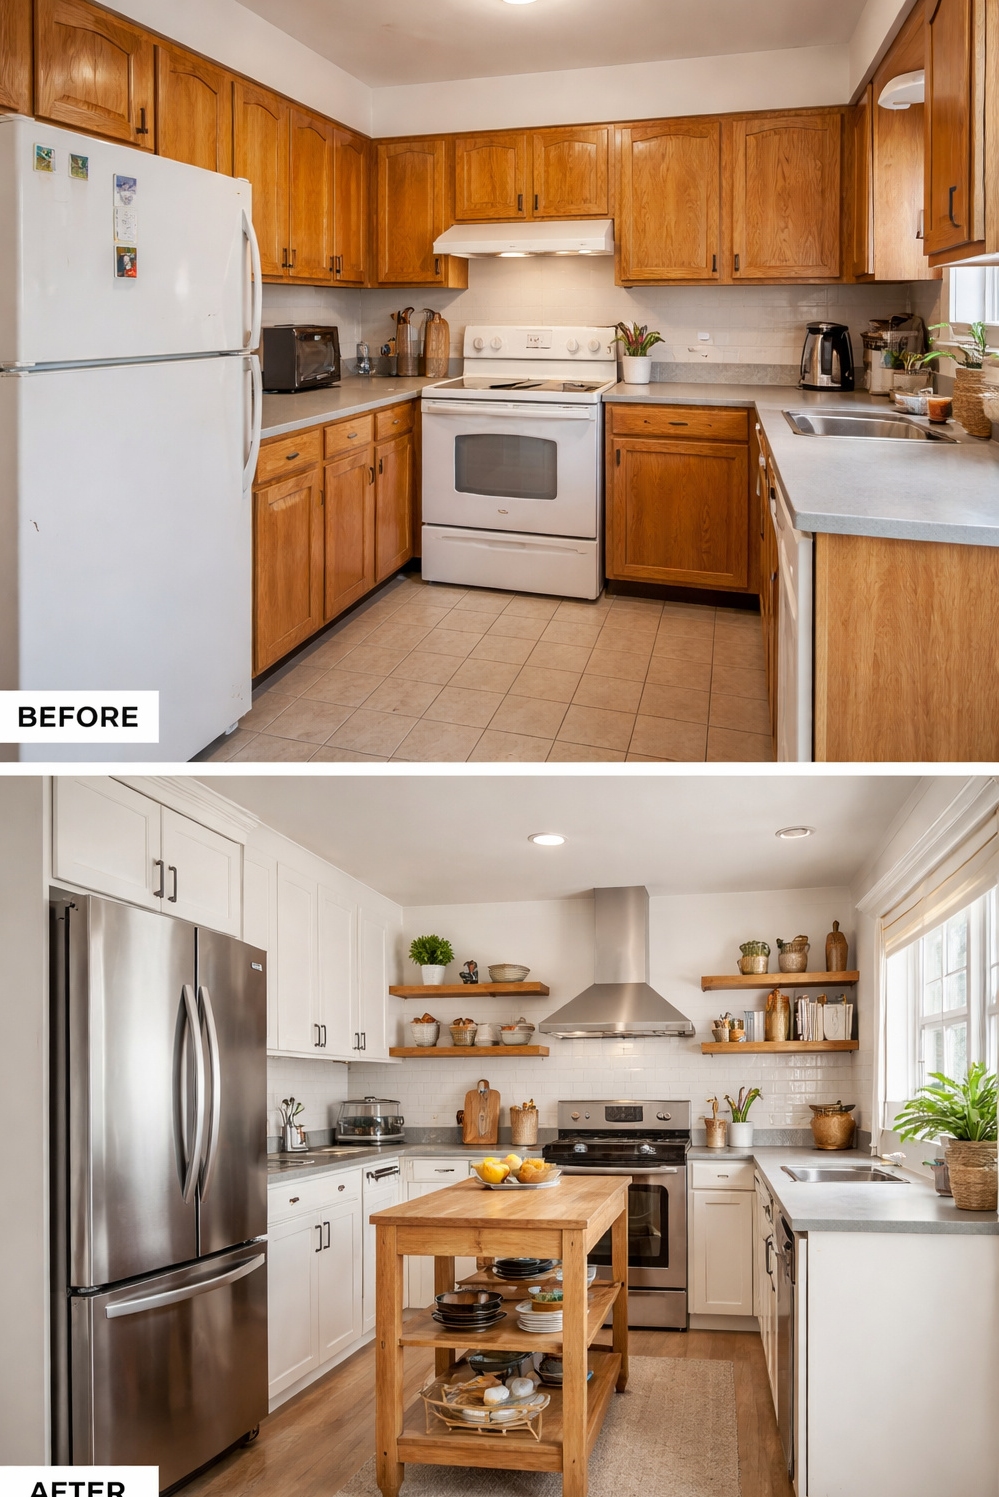
This method focuses on maximizing the impact of a few key appliance upgrades and optimizing kitchen layout without major structural changes. It prioritizes functionality and visual appeal through careful selection and placement.
Wrap
- Identify the single most outdated or dysfunctional appliance to replace with a refurbished or scratch-and-dent model.
- Re-arrange existing appliances to improve workflow and create a more efficient kitchen triangle.
- Add a mobile kitchen cart or island to increase counter space and storage, strategically placed for optimal use.
- Declutter countertops and cabinets to create a sense of spaciousness and highlight the updated appliances.
- Careful planning and strategic execution can transform your kitchen with minimal investment. Always consult appliance manuals for safe installation and operation.
Tips
- Research appliance sales and discounts thoroughly before purchasing.
- Consider energy-efficient models to save money on utility bills in the long run.
Visually Cohesive Kitchen: Budget Method
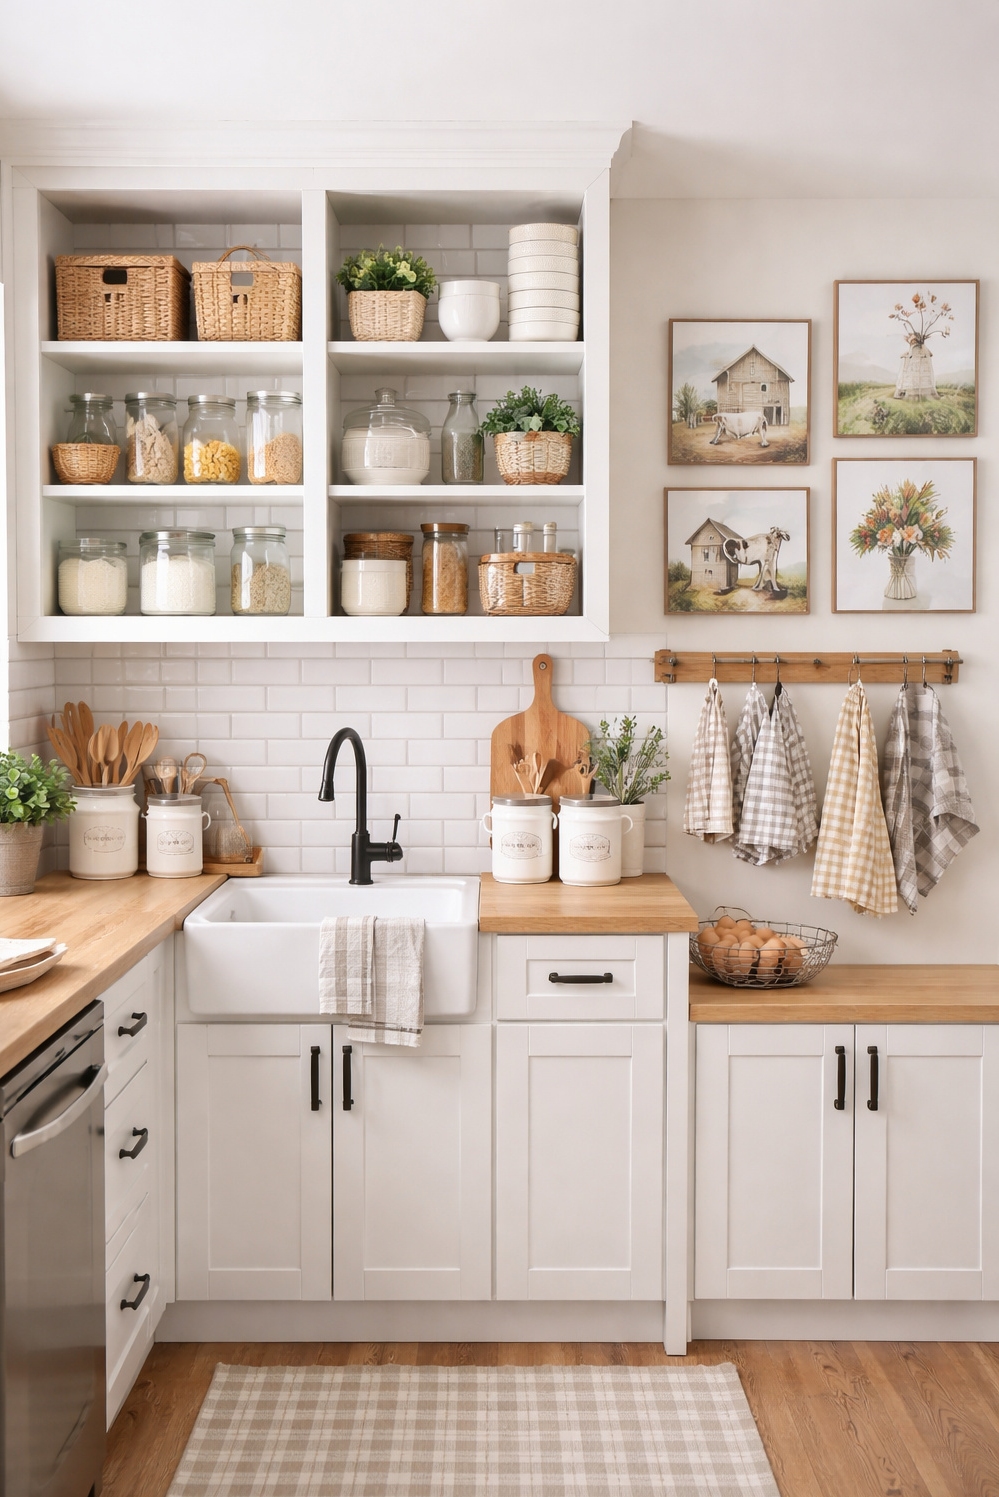
This method focuses on creating a cohesive and visually appealing kitchen through themed decor and improved organization. It utilizes affordable accessories and storage solutions to transform the space’s aesthetic and functionality.
Steps
- Choose a specific kitchen theme (e.g., farmhouse, modern minimalist, retro) and research affordable decor options.
- Implement a comprehensive decluttering and organization system for cabinets, drawers, and pantry.
- Introduce themed accessories such as dish towels, canisters, wall art, and small appliances to enhance the chosen aesthetic.
- Utilize budget-friendly storage solutions like baskets, jars, and drawer dividers to maximize space and maintain organization.
- Add a focal point, such as a gallery wall of themed prints or a decorative fruit bowl, to draw the eye and reinforce the theme.
Tips
- Shop at thrift stores, flea markets, and online marketplaces for unique and affordable decor items.
- Repurpose existing items to fit the chosen theme (e.g., painting old jars to use as storage containers).
Wrap
A well-defined theme and organized space can dramatically improve your kitchen’s look and feel without breaking the bank. Ensure all decor items are safely secured and do not obstruct walkways or work areas.
Final Thoughts
With some smart choices and effort, you can achieve a kitchen upgrade without breaking the bank. These ideas, from cabinet updates to lighting swaps, prove that a stylish and functional kitchen is within reach, even on a tight budget.
Living Around The World is part of the Amazon affiliate program. As such, when you click on one of the links, we may get a small commission if you make a purchase. Thank you for helping us keep the blog running.